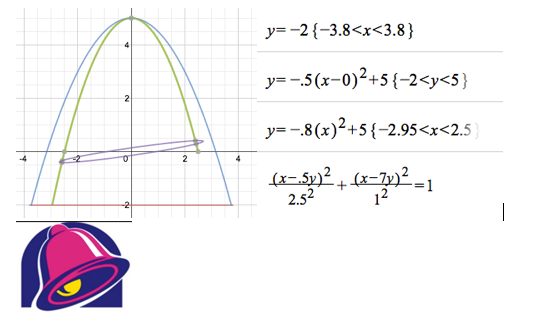
In MTH 641 this past week, we spent some time on conic sections. I have always found them to be fascinating. Only a slight change in an equation can result in a completely different graph! Not to mention how they are all cross-sections of a cone. Despite this, students sometimes struggle to find that same fascination and excitement. After reading the article “Draw It, Write It, Do It” by Leapard and Caniglia, I was inspired to make see if I could make conic sections more meaningful for my students with conic art. Below is my first attempt at making a picture out of conics sections, and the equations that I used. My first idea was to make the Taco Bell logo (also below). Here were my steps:
- Make the bottom horizontal line. This was very simple. I knew I just needed to make an equation in the form of y=k.
- Next I made the blue parabola. I knew it needed to be opening down with a y-intercept a decent distance above my horizontal line. I decided to keep it symmetric about the origin.
- Next I decided to restrict the domains of each of these functions to resemble the taco bell logo. This took a bit of experimenting in order to find that point of intersection (an advantage of using an automatic grapher rather than doing all of the algebra by hand).
- My next thought was to make another parabola. Since I didn’t know how to make a parabola with a “tilt,” I decided to simulate a tilt by restricting the right endpoint of the domain more than the left.
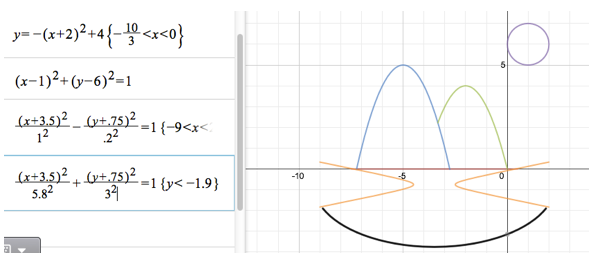
- My next idea was to create an ellipse, which I experimented with to get it centered and of the correct width. I knew I need to find way to actually tilt my ellipse to create an accurate representation. With a little research, I found that having a sum or difference of x’s and y’s in the numerator of the ellipse formula could create such an effect. After a bit of experimenting and not being able to shift my ellipse up or down, I decided a “non-tilted” picture might be a better place to start.
This time, I decided to draw my own picture for inspiration:
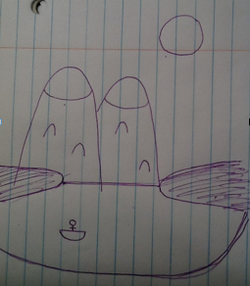
My strategy this time around was to make my equations as easy to manage as possible. Step 1: Horizontal line (water line); Step 2: Parabolas (mountains); Step 3: Circle (sun). Using the vertex form of the equations allowed me to not have to perform a lot of trial and error. Also, I used my graphing calculator to find the zeros of the parabolas, as well as their intersecting point. Here’s my start:
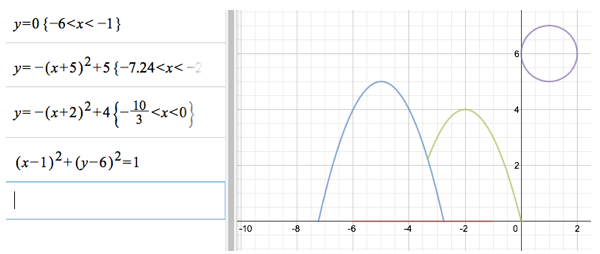
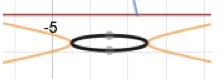
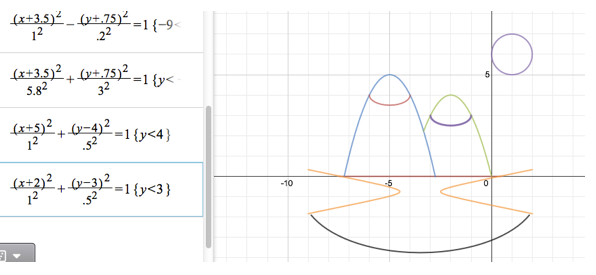
My next challenge was to create the hyperbola (tree line on both sides of the picture) and half-ellipse (lake). First, I tried to create a hyperbola centered at (-3.5, -1). This line the parabola up correctly, but I definitely had to play with the a and b values to make it narrow enough to resemble a tree line. I also realized it needed to be shifted up, as the tree line would have needed to be centered at y=0, not y=-1. For ease, I decided to “meet in the middle” at y=-.75. This simply required my to widen the restrictions for my horizontal water line. Next was the half-ellipse. As a starting point, I decided to try an equation for the half-ellipse identical to my hyperbola, only with a “+” instead of a “-.” It was interesting to see that this resulted in an ellipse that sat right in the middle of the hyperbola (see right). This was obviously too small, but was lined up right where I wanted it!
It was a simple adjustment: increase the a and b values to increase the size of the ellipse. I knew I needed the a-value to be larger than the b-value in order for the horizontal axis to be longer than the vertical axis. Below is my result:
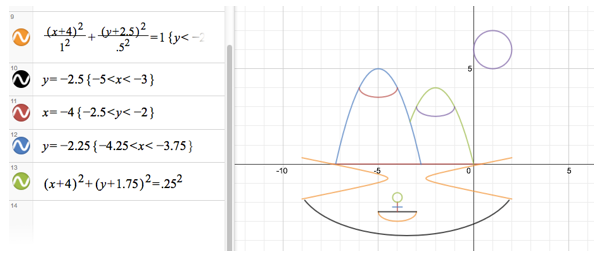
Getting closer! My next step, I decided, had to be the partial ellipses to show the snow-capped mountains. Knowing the centers of each ellipse based on the picture, this went really quickly! I was also surprised that I could use whole numbers in my range restrictions.
After looking at the rest, I decided to forget the mountain’s accent marks because I don’t think they add a lot to my picture and would have required an additional four equations. However, I was determined to get the man in the boat!
I used the same basic half-ellipse as I did for my snow capped mountains, simply changing the center. Then I made tiny horizontal and vertical lines for the man’s body, carefully selecting the restricted domain and/or range. The circle (head) also went smoothly as I was able to clearly visualize the center, as well as the size of the radius. It worked!
I used the same basic half-ellipse as I did for my snow capped mountains, simply changing the center. Then I made tiny horizontal and vertical lines for the man’s body, carefully selecting the restricted domain and/or range. The circle (head) also went smoothly as I was able to clearly visualize the center, as well as the size of the radius. It worked!
Overall, I was happy with how my drawing turned out. Now that I have had success creating a simple picture, my next drawing will be a bit more complex.
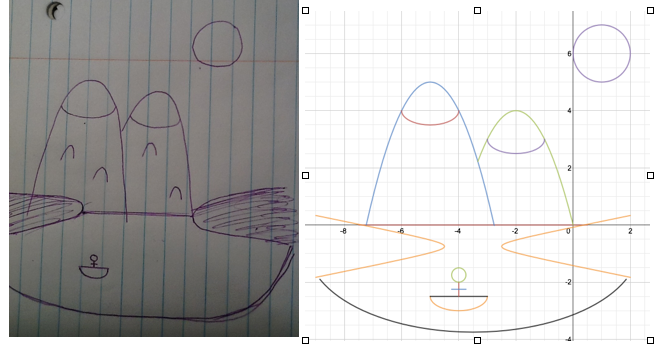
Final Side-by-Side Result:
Final Side-by-Side Result:
 RSS Feed